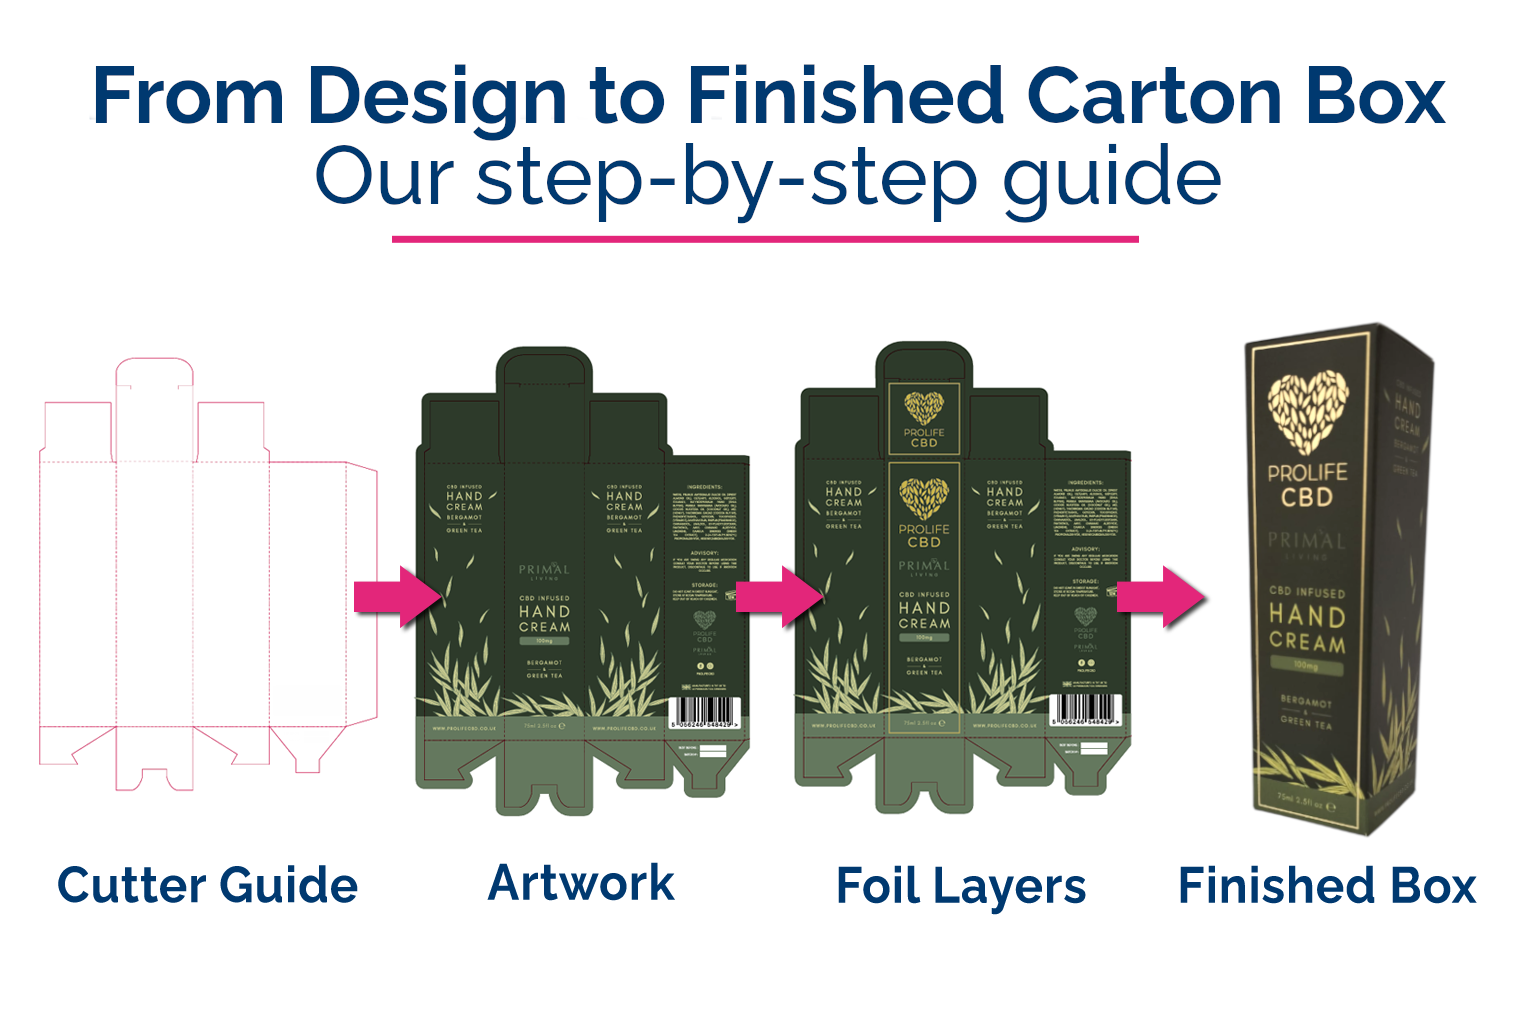
Step-by-Step: From Design to Finished Carton
Ever wondered what happens between conceptualising a box and actually having it made? Here’s our step-by-step guide:
1. Structural design
This is the most important step for ensuring that your box is fit for purpose. We take into consideration your product specifications like weight, retail requirements and crucially, whether you are using automated packing lines or hand packing.
Options for the box closures include tuck-end, lock-bottom, and crash-lock, but we can also create fully bespoke solutions too. Once decided, and the dimensions set, a key-line diagram of the cutter guide is made.
Material selection comes next. Choosing the correct board grade and thickness helps protect your product and improves shelf presence. At Stag Print we only use FSC® or PEFC certified paperboard, guaranteeing it comes from sustainable sources.
2. Print ready artwork
Next, we need to make print-ready artwork and there are strict guidelines to follow to ensure that the end result is perfect.
Files need a minimum 3mm bleed, need to be supplied in CMYK (not RGB), and have special pantone colours or finishes clearly layered. We can advise on this and also finer points, such as ensuring any critical text in very small font sizes be printed as a high tint of black only.
Our team checks every file before it goes to press, and we can advise your designers to ensure they setup the artworks correctly at this stage in order to prevent delays and avoid costly errors.
3. Print production
Once approved, the boxes need to be printed – this is the most exciting stage as your boxes become tangible. We offer two methods of printing:
Litho print has a high setup cost, but a low cost of reproduction, meaning it is more cost-effective on larger production runs. Litho print offers exceptional colour consistency, sharp details and high-end print quality.
Digital print in contrast has a low setup cost but a higher cost of reproduction, making it suited for lower production runs. This makes it perfect for small orders, seasonal campaigns, test runs and even personalised print.
4. Special embellishments
Print lays the foundation, but it’s often the embellishments that add the real visual impact. Premium finishing techniques add texture and contrast, helping products stand out on the shelf. Examples we offer include:
Foiling adds a metallic or coloured layer (gold, silver, pantone or holographic) to highlight key design elements. Foils can be gloss or satin, brushed or smooth – the options are endless.
Embossing and debossing create raised or recessed areas, adding a tactile dimension to the box and often enhancing the unboxing experience for the end user.
Spot UV involves applying a high-gloss varnish to selected areas, creating contrast against a matte or uncoated background. Often used to create patterns or make logos stand out.
5. Die cutting
Die cutting transforms printed flat sheets into shapes that are ready to be assembled to 3D. A cutting forme is made to the specifications of the original cutter guide in the first step. This forme, under tonnes of pressure, is used to accurately cut and score each sheet of paper to the shape of the box.
Precision at this stage directly affects alignment and structural integrity. That’s why we carry out rigorous quality checks to ensure clean edges, accurate creasing and perfect registration.
6. Gluing
After die-cutting, cartons move to gluing. Simple cartons only need a single strip of glue, with both ends closed by simple tuck-end closure. More complex boxes, such as crash-lock bases, require multiple adhesive points. Precise gluing ensures cartons hold their shape, assemble efficiently and perform reliably in transit and on shelf.
The type of glue used is also critical as not all glues are freezer safe, but these are also more costly so you wouldn’t use these on boxes that are only exposed to ambient temperatures.
7. Safe transport and delivery
The final stage is ensuring the boxes get to you safely and on time.
The cartons are bundled, boxed in corrugated outers and securely strapped to pallets to prevent movement or damage during transit. We supply the boxes to you flat-packed to maximise transport efficiency by reducing space requirements.
Concept to carton
At Stag Print every stage is carefully managed to ensure high quality production – from structural design through to final delivery.
Planning your next project? Get in touch to find out how we can support your future carton packaging.